
To begin, be sure you can open Photoshop and use Google Chrome.
Follow this link:
https://stevecampbellhillwood.blogspot.com/2017/11/how-to-open-photoshop.html
Open Chrome the same way.
Always keep the Photoshop icon and the Chrome icon in your dock.
To do this, click and hold on the Photoshop icon. When you see the Options menu, select Keep in Dock and Open at Login.
Do the same with the Chrome icon.
Open Photoshop by clicking or double clicking the Photoshop icon in your dock.

To Repeat: Always keep the Photoshop icon and the Chrome icon in your dock.
To do this, click and hold on the icon. When you see the Options menu, select Keep in Dock and Open at Login.
Do the same with the Chrome icon.
With Photoshop open, go to Window>Workspace>Essentials

Now, go to Window again and be sure you have checked (✓) Layers, Application Frame (and/or Application Bar), Options (if possible) and Tools
Make a sample Photoshop document
Go to File>New

Enter this:
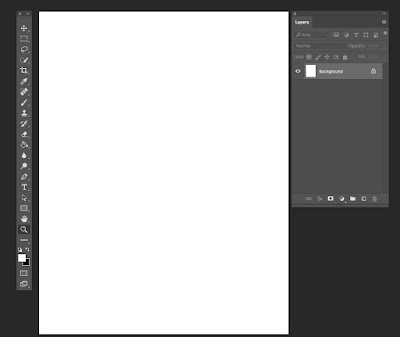
If your new document display, which should be a white, vertical rectangle, is very small, (even so small, you almost can't see it) go to View>Fit on Screen.
You should now see your Photoshop document, pus a Layers Palette that looks similar to this.
Now go to File>Save As. At the Save As window, be sure type in your first name and last name and Photoshop 101 appears. Save into your documents folder (If this is not possible, you can save onto your desktop.)
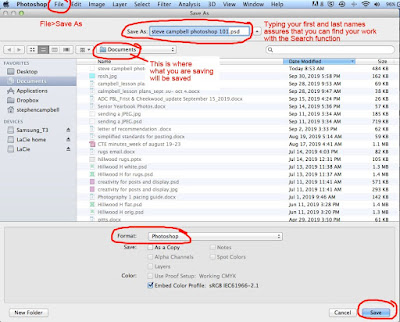
For right now, it is OK to save as a PSD (or JPEG). Click Save.
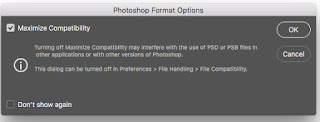
If you get this message, click OK
Next.........
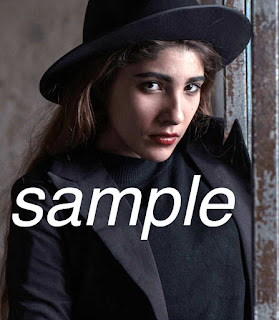
Click, hold and drag this photo, the one below, onto your desktop
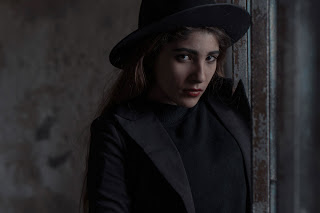
From your desktop, click, hold and drag this photo into the new Photoshop document.
You will probably need to resize this photo.
Follow these directions:

Click on a corner if you do not see
the diagonal arrows. Be sure you resize
using Shift+drag from a corner.
Press the return/enter key on your keyboard
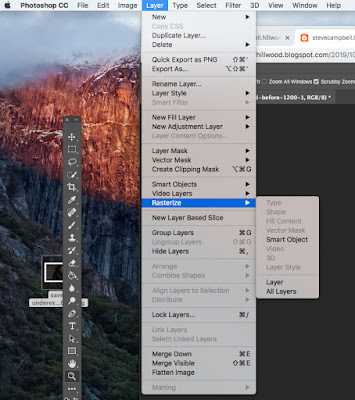
Now, go to Layer>Rasterize>Smart Object. You could also select Layer or All Layers at this point.
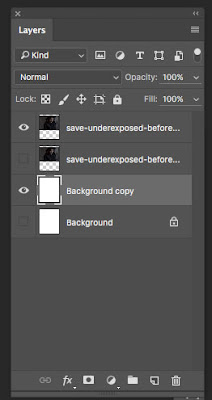
Look at your Layers Palette. You should see a picture and description of the photo you just placed in Photoshop.
You should also see a white layer that reads Background and has a padlock to its right.
With either layer selected, press and hold Command+J on your keyboard. You should now see a duplicate (copy) layer in your layers palette.
Now select the other layers and copy them using Command+J
Your Layers Palette should now show 4 layers. They should read Background, Background copy, Layer 1 and Layer 1 copy. The photo layers may read something else. That's OK
You should see an eye icon to the left of all layers.

Click on the eye icon (circled in red above) beside Background Layer 1. The eye should disappear. You have turned this layer off and should leave it turned off unless you need to totally start over.
Turn off one of the Photo layers also, so it may be re-used as well.
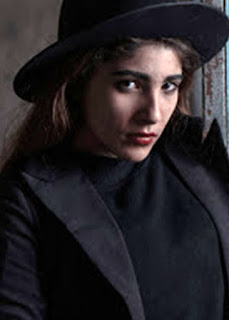
You can also darken photos that are too light.
Here is another way to use Levels: https://www.youtube.com/watch?v=gvtbu-uzr6o
Try to make your photo tones look like this:
Follow this link:
https://stevecampbellhillwood.blogspot.com/2017/11/how-to-open-photoshop.html
Open Chrome the same way.
Always keep the Photoshop icon and the Chrome icon in your dock.
To do this, click and hold on the Photoshop icon. When you see the Options menu, select Keep in Dock and Open at Login.
Do the same with the Chrome icon.
Open Photoshop by clicking or double clicking the Photoshop icon in your dock.

To Repeat: Always keep the Photoshop icon and the Chrome icon in your dock.
To do this, click and hold on the icon. When you see the Options menu, select Keep in Dock and Open at Login.
Do the same with the Chrome icon.
With Photoshop open, go to Window>Workspace>Essentials
Now, go to Window again and be sure you have checked (✓) Layers, Application Frame (and/or Application Bar), Options (if possible) and Tools
Make a sample Photoshop document
Go to File>New
Enter this:
 |
| Be sure you have entered your name and Photoshop 101 correctly. Document Type is not critical at this point. You could just select Document Type: U.S. Paper Be sure Width and Height show as inches. Be sure Resolution is 300 Pixels/Inch Be sure Color Mode is RGB. Be sure Background Contents reads White Color Profile: Working RGB sRGB ICE61966-2.1 Pixel Aspect Ratio:Square Pixels If this is correct, click OK |
If your new document display, which should be a white, vertical rectangle, is very small, (even so small, you almost can't see it) go to View>Fit on Screen.
You should now see your Photoshop document, pus a Layers Palette that looks similar to this.

Now go to File>Save As. At the Save As window, be sure type in your first name and last name and Photoshop 101 appears. Save into your documents folder (If this is not possible, you can save onto your desktop.)

For right now, it is OK to save as a PSD (or JPEG). Click Save.
If you get this message, click OK

Next.........
Click, hold and drag this photo, the one below, onto your desktop

From your desktop, click, hold and drag this photo into the new Photoshop document.
You will probably need to resize this photo.
Follow these directions:

Click on a corner if you do not see
the diagonal arrows. Be sure you resize
using Shift+drag from a corner.
Press the return/enter key on your keyboard
Now, go to Layer>Rasterize>Smart Object. You could also select Layer or All Layers at this point.

Look at your Layers Palette. You should see a picture and description of the photo you just placed in Photoshop.
You should also see a white layer that reads Background and has a padlock to its right.
With either layer selected, press and hold Command+J on your keyboard. You should now see a duplicate (copy) layer in your layers palette.
Now select the other layers and copy them using Command+J
Your Layers Palette should now show 4 layers. They should read Background, Background copy, Layer 1 and Layer 1 copy. The photo layers may read something else. That's OK
You should see an eye icon to the left of all layers.

Click on the eye icon (circled in red above) beside Background Layer 1. The eye should disappear. You have turned this layer off and should leave it turned off unless you need to totally start over.
Turn off one of the Photo layers also, so it may be re-used as well.

To edit photos that are too dark, follow the directions in the image below. Click on this image (below) for a larger and clearer view.
 |
You can also darken photos that are too light.
Here is another way to use Levels: https://www.youtube.com/watch?v=gvtbu-uzr6o
Try to make your photo tones look like this:


